
The spinning wire experiment is actually an experiment that creates a simple motor, known as a homopolar motor, with the use of just three things.
Download pdf of activity, that include samples table to record student observations
Learning intentions
Students will replicate Faraday’s simple electric motor to build on their understanding of the relationship between magnetism and electricity.
Aim To examine and understand the relationship between electricity and magnetism and use that knowledge to build an electric motor.
Before the experiment You are going to use magnets, a battery and copper wire to replicate one of the first electric motors. The physicist, Michael Faraday, was probably the first to demonstrate that the forces generated by electric currents and magnetism could be turned into mechanical forces that he used to demonstrate the first electric motor. His research and crude electric motor paved the way for the modern electric motor and, soon after, the knowledge to turn mechanical motion into electricity, which is the way we still generate most of our electricity today.
Hypothesis
You have formed a circuit because you have connected a wire between the positive and negative terminals of a battery. There will be a charge flowing through the wire, that will generate a magnetic field.
The magnet you will place on the end of your battery will generate its own magnetic field that the wire with its flow of charge will pass through. Make some predictions based on the following questions:
There are forces in operation here. Where will the forces have to be applied to make the wire spin?
What effect will the magnetic field from the electrical wire have on the magnetic field from the magnet?
What would happen if you turn the battery up the other way and place the wire on top of the opposite terminal?
What would happen if you added two (or more) magnets? What would happen if you moved the bottom section of wire touching (or nearly touching) the bottom terminal away from the terminal?
Materials
- AA battery
- Copper wire (you can purchase copper picture wire at hardware stores)
- A round neodymium magnet. These are readily available online, from eBay, or electrical supply stores.
Method
- Attach your neodymium magnet to one end of the battery.
- Place the battery upright on a table with the magnet at the bottom (between the table and battery).
- Fashion your copper wire as shown in Figure 1.
- Place the wire on top of the battery
Watch it spin (you may have to give it a small nudge to get it going).
Test your hypotheses by controlled experiment.
Construct a table such as the one below to record your observations.
In your table, observe and record what the wire did in each of the following scenarios (plus any other cool ideas you want to test):
- Closed circuit and magnetic field (as described in steps 1-4 in the Method above)
- Battery turned up the other way
- Two or more magnets
- Wire moved away from bottom battery terminal
Safety note: When you have finished, remove the wire from the battery as the wire can rapidly heat up and cause a fire. Remove the magnets from the battery as leaving them attached can drain the battery.
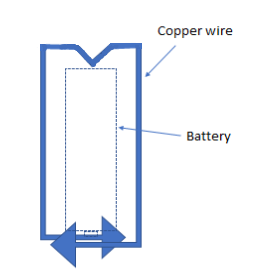
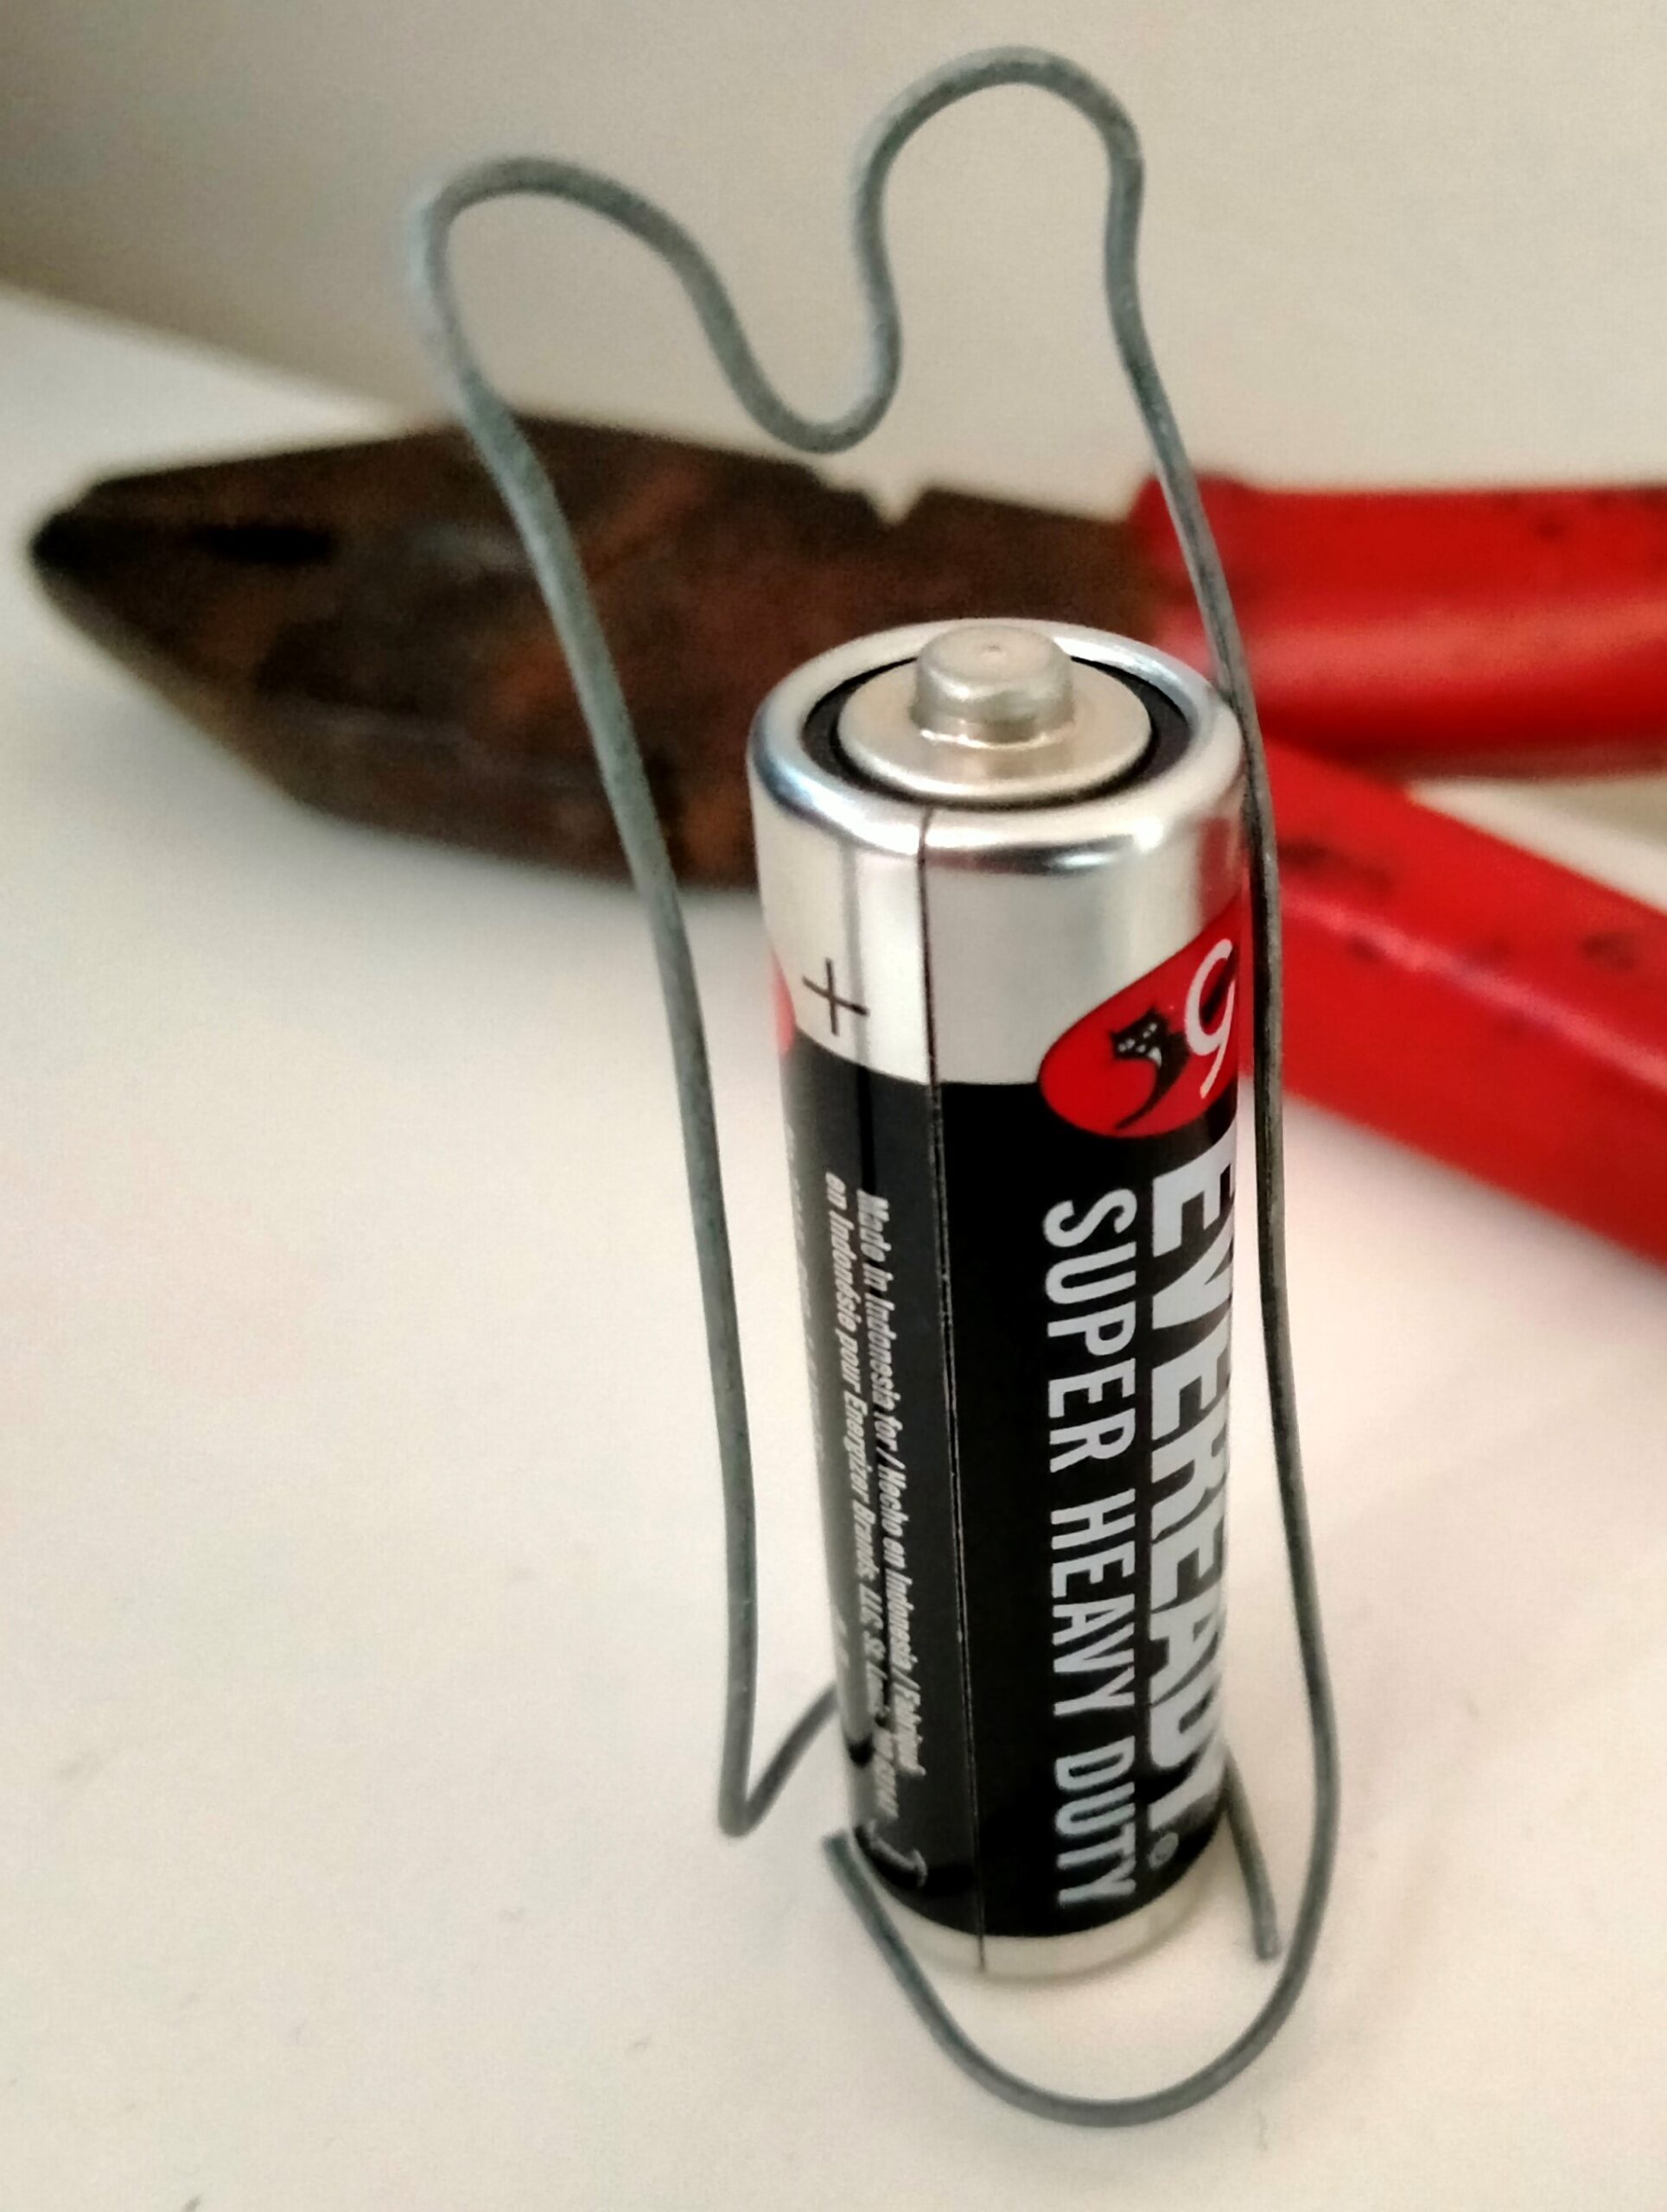
Figure 1. Shape of copper wire to fit over the battery and magnet.
Extended thinking
The Earth has a magnetic field. Why does it not make all our wires start spinning? What is missing to make this happen?
Consider what the world would be like if we did not have the electric motor – in other words if there was no such thing as the Lorentz Force? How many things do you have at home or use that require an electric motor? Note the position of the North-South poles of the battery in your experiment. The poles are vertical, North above South. Think about the direction of the magnetic field that comes from this orientation of the magnet. What would happen to the wire if you used a magnet with the poles aligned horizontally, left-right, as in the right-hand image in Figure 2. Note the magnetic field lines and the direction they travel in through the wire. Compare this to the left-hand image.
Teacher notes
The year level and knowledge of the student will determine the level of critical thought required for a hypothesis. Upper primary students should be able to understand that a magnetic force is affecting the wire in some way to make it spin. Older students should be able to think about the interaction of the magnetic fields to generate the force necessary to make the wire spin. Students get the opportunity to build a circuit in the FLEET Schools resource, Conductors, insulators and electricity, (Activity 9).
What is happening?
Electrons travelling through our circuit will generate a magnetic field that will interact with the magnetic field generated by the magnet. Note that magnetic fields from a magnet emanate outward from the North pole to the South pole on the outside of the magnet. See Figure 2.. The interaction of the two magnetic fields generate what is known as the Lorentz force, which is simply the force you get when you bring the same magnetic poles of a magnet together. They will oppose each other, but in this case the Lorentz force is perpendicular (at a 90-degree angle) to both the direction of the electron movement and the magnetic field. To visualise this, think about standing in the corner of a room and put your arms along each wall. One arm is pointing in the direction the current travels (negative to positive*). Your other arm points in the direction of the force from the magnet’s field. Your head and feet point in the direction of the Lorentz force. It is the Lorentz force that is acting on your wire to make it spin. In Figure 2 note that in the left-hand image that represents the set up in this experiment, the direction of the magnetic field on one wire is the opposite on the other wire. This means the Lorentz force will push the wire on one side and pull it on the other side, which is why your wire keeps spinning.
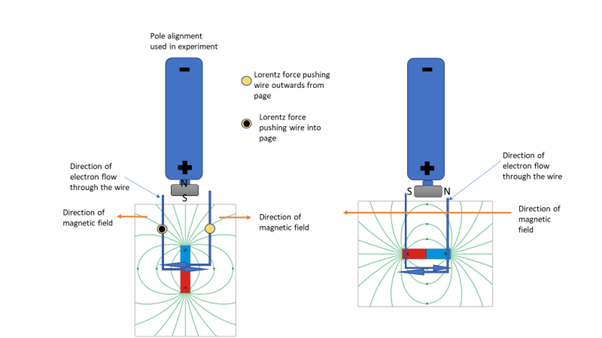
Figure 2. Operation of spinning wire showing direction of electron flow through the wire, the magnetic field and effect of Lorentz Force.
*In the conventional model the current is considered to travel from the positive to the negative terminal. You will often see reference to the right-hand rule, which is similar to the analogy above where you stand in the corner of a room to work out the direction of current, magnetic field and the Lorentz Force. In the electron model where the current flows from negative to positive you would use your left hand to achieve the same effect.
Learn more about conductors, insulators and electricity in the FLEET Schools resource
Back to Home Science activities.